


 Cables + Lace Scarf Pattern, $5.00
Whoooo’s in the Halloween spirit?
Sorry, I had to.
I finished my halloween garland today. It was a relatively simple project idea formed while I was in the Martha Stewart Crafts section of Michael’s. I first saw the owl stamp on someone’s blog (can’t remember where, but they recieved it in a swap). I walked all the way around Michael’s with the itch to buy something, then wandered my way back to the MSC section in a daze because I wanted to make something halloweeny, but not disposable. Here’s what I did:
First, I sewed some fabric flags that were slightly larger than the stamp. (With wrong sides facing, fold a piece of fabric twice as wide as the stamp plus two inches or so in half. Sew up one long and one short side. Turn inside out, press). I made twelve. I painted the foam stamp with acrylic paint and stamped each flag.
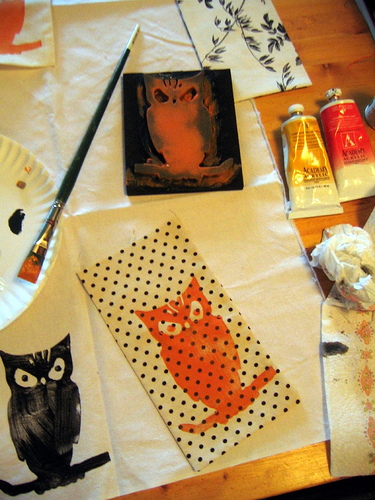
(Tip: Start with white paint, then orange, then black. It’ll just be easier!)
After that, I trimmed all of the flags to the same height with my rotary cutter. As you can see, I’m in the middle of some other projects which I had to push out of the way.
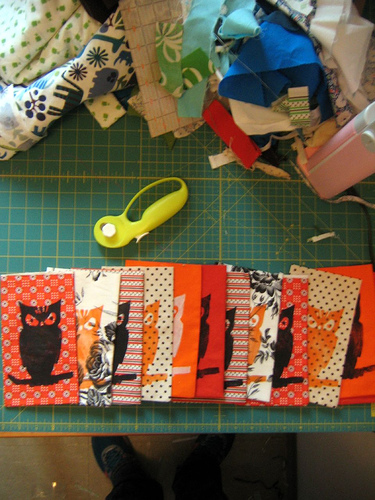
I pinned each flag into the fold of a double wide bias tape, spacing them about 2 1/2″ from each other. I sewed a straight line for the length of the tape, making sure to catch all of the layers, and voila! A garland!
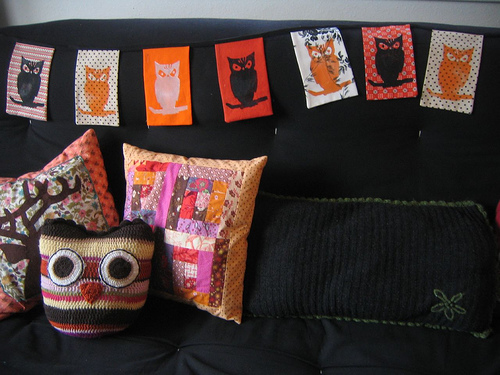
Although I intended to hang it the wall somewhere, it looked best on the couch with its other handmade friends. Now I have a halloween decoration that’s not just junk I’ll throw away after this month is over. Plus, I busted some of my stash. Mission accomplished.


