Crochet Pattern PDFs 
Peanut Butter Pattern, $6.50 

Circles Scarf Pattern, $5.00

Stellar Beret Pattern, $5.00

Raindrops Scarf Pattern, $5.00

Artichoke Hat Pattern, $5.00

Lace Slouch Hat Pattern, $5.00

Starry Night Cardi Pattern, $6.50

Pebble Hat Pattern, $5.00

Petal Beret Pattern, $5.00

Covered Hangers Pattern, $5.00

Diamond Lace Scarf Pattern, $5.00

Blackberry Beret Pattern, $5.00

Cotton Candy Cowl Pattern, $5.00

Simple Hat Pattern, 4 Sizes, $5.00
 Cables + Lace Scarf Pattern, $5.00 Cables + Lace Scarf Pattern, $5.00
To see more of my crochet patterns, click here!.
|

Craftsy is having a Valentine’s Day Sale! Not only can you get my crochet classes (check out all the cute projects!), you can also check out all of the awesomeness we’ve been working hard to produce. I’ve met so many awesome instructors and I think you’ll not only learn, but enjoy watching these classes and interacting with these wonderful ladies. Enjoy!
When I first started going to my local yarn shop (in Montana) one of the yarns I was immediately drawn to was Noro. The colors are simply amazing, and as a designer, I’ve always loved it for it’s LONG repeat. Variegated yarns often alternate colors too quickly for crochet, and so do many “self striping” yarns designed for knitting. But that’s not the case with Noro and that’s why I’ve always loved using it in my designs. When I found out that Sixth & Spring was publishing a Crochet Noro (to follow up to their Knit Noro (to follow up to their Knit Noro books) I was excited! books) I was excited!
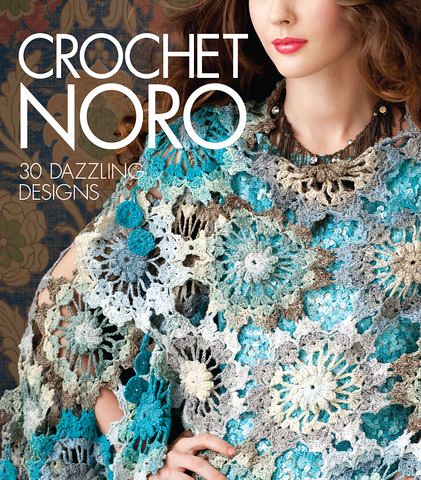
My two contributions are both really simple to make, and ideas I’ve made or bopped around in my head for a long time. The beauty of this yarn is that it does not need a complex pattern. I repeat: you can do some fancy footwork, but there’s no point, because everyone’s going to be staring at the color. And don’t we all know how nice it is to have a pattern that doesn’t make us think? I am enjoying that more and more these days.
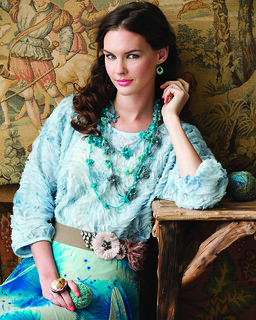
This Floral Necklace was born out of the nametag holder I made for my name badge when I worked at Yarnivore. I whipped it up one day while it was relatively quiet and continuously got asked how to make it, so I figured this would be a nice + easy design to submit- and it was. We added beads to the centers and used Taiyo sock to make it delicate–but I still think you could work it in a heavier yarn if you wanted fewer strands.
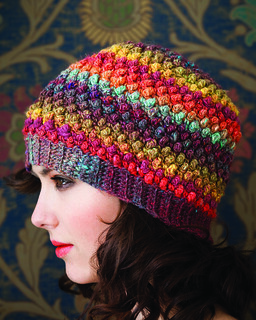
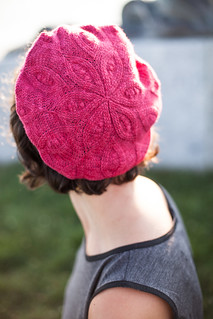
I also crocheted this lovely Bobbled Hat. It is worked from the top down in the round–pretty simply–and just takes advantage of the jelly bean like colors of a couple skeins of Noro Silk Garden (DK Weight). You have to block this to get it to drape, and drape it will. I’m so happy that there are so many blends of Noro now, because I definitely prefer the feel and weight of Silk Garden to the first ball of Kureyon I ever pickedup. I still intend to make this one again–it practically crochets itself as you say “just one more row to see how the colors go….”
There are tons of other lovely designs, including a couple totally wearable basic cardigans worked in the round and fun tunics and shells–plus, lots of quick accessories, all lushly photographed as is the Sixth & Spring way. Pick up a copy and get inspired the next time you’re at your LYS, or right here.
Photography by Rose Callahan copyright © by Sixth&Spring Books/Knitting Fever, Inc. All rights reserved. Used by permission.
Disclaimer: All book links are affiliate Amazon. links.
I feel like we’re finally starting to settle in here, and I’ve even had some time to make “just for fun” stuff–wahoo! It’s hard to say no to design work but the reality is that I don’t have a ton of time for it and it’s really nice to just take the time to make something for me! Here are some of the things I have been working on.
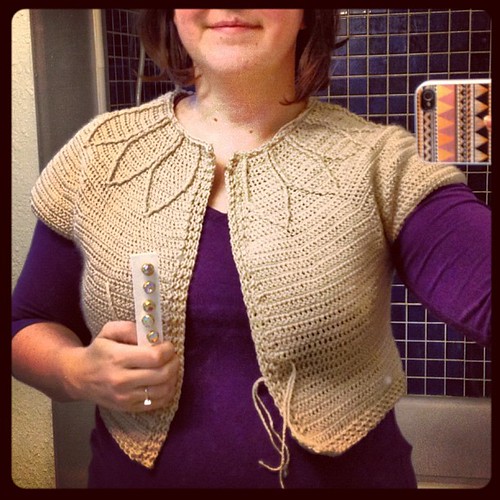
I’m nearly finished crocheting Piped Petals Cardigan #2, The Wedding Shrug Version. This is made with the pattern from my Sugar and Spice E-book and 2.1 skeins of Fyberspates Scrumptious 4ply yarn. I literally had 2 rows on the button band and 10 rows total of sleeve edging to work when I had to break into the third skein, so if you’re my size (around 40″ bust) then 850 yards will get you a short shrug (I just crocheted fewer rows to get this length, since it’s a top-down piece). I have some excellent buttons for this, which I guiltily purchased at Stitches Midwest. See, sometimes I *do* use stuff from my stash! I’m almost done with this one but what do you want to bet it takes me weeks to get those last few rows done, ends woven, and blocked?
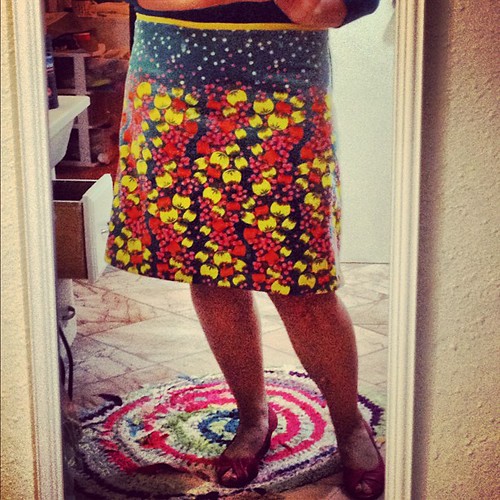
I also spent a couple weekends drafting and sewing my own A-line skirt pattern with the help of Craftsy’s “Design and Sew and A-line Skirt” class, plus all of the sewing skills I’ve learned through osmosis while filming classes. We have an exciting class about fit coming up, and I used what I learned there to make 2- count ‘em- 2 muslins of this skirt before cutting into this luscious velveteen fabric. I went above and beyond and added a lining, and I think I spent at least a few hours sitting there being scared to sew it all together. All in all it looks pretty decent (I’ll almost always wear it with a shirt untucked), despite this crummy instagram photo, filtered to high heaven to protect your eyes from my “winter legs”. I might look like a highlighter when I wear this but I like it!
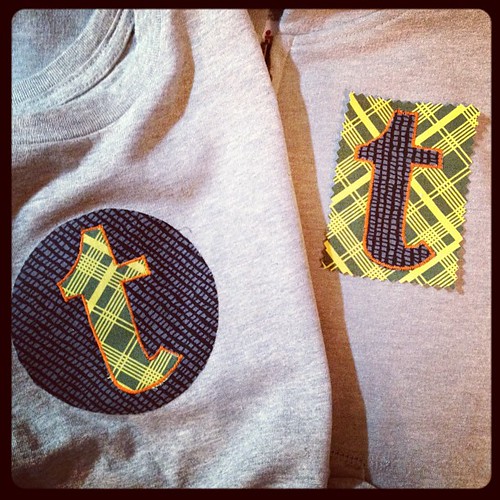
Also in sewing, I made some more quick and super-easy applique items for my nephew’s gift. Don’t worry, I also got him a fun gift– but I made him a “T” shirt a few years ago and he still wears it, and everyone always compliments it, so I knew I wanted to make more. It has taken me a shamefully long time to getting around to making these- I actually had one of the shirts in my bin that I intended to make him for LAST xmas. At least I bought a size too large, so hopefully it will fit him this year. I used a grand total of 2 charm squares and a touch of heat’n'bond light to whip out these two. This photo was snapped before the final sewing around the edge, but you get the idea.
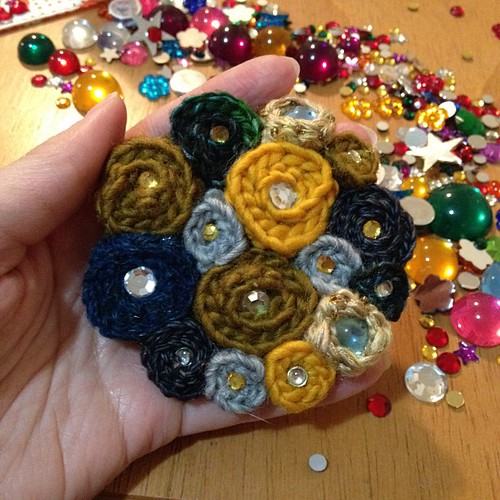
Last but not least, I spent last weekend crocheting some tiny simple flowers for a hair ornament to wear to our holiday party at work. I saw some similar ones made of felt at a craft fair but I wanted to make my own. Turns out I have more yarn than felt, but you knew that already, right? I used some plastic rhinestone-type gems that I got in New York, oh, 11 years ago, when someone was giving away much of their stash on Craigslist. I learned to crochet with yarn from that same stash. And I’ve moved those gems at least 4 times, but see, I do use the stash! If you’re wondering how to make these little flowers, I have a pattern with similar (bigger!) flowers coming out in a book sooner or later. Stay tuned.
What crafts are you working on right now? Are you making holiday gifts? Let me know in the comments.
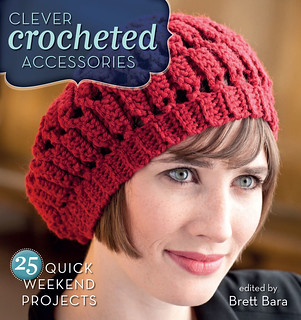
Sorry to have pretty much fallen off of blogland lately, we’ve been busy planning for the wedding and for going home for the holidays (YAY!). In the meantime, lots of projects have been published, so here I am to share. Brett Bara put together a fun compilation of accessory projects for her latest book with Interweave, Clever Crocheted Accessories: 25 Quick Weekend Projects . .
She asked me to do some fingerless gloves, and I knew I wanted to work in Madelinetosh, because, well, it’s Madelinetosh. I love, love, love cables and sock yarn and combined them to make these Cabled Mitts (ravelry page here).
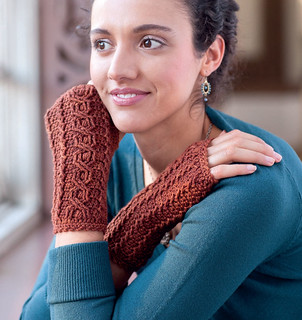
I remember I was working on these while waiting for my sister at the local college and an avid crocheter came up to me and remarked that she didn’t even know you could do that in crochet. You can! These are simple to make, because there’s no shaping, so you’re pretty much making an intricate rectangle that’s reversible from hand to hand. I made a second pair of these for myself, but I did a ribbed cuff instead of carrying the cable all the way up, and that’s pretty easy to do, too. I find cables to be so addictive, I guess I like changing things up every few stitches.
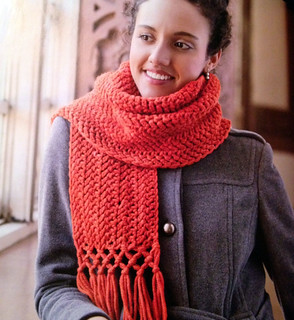
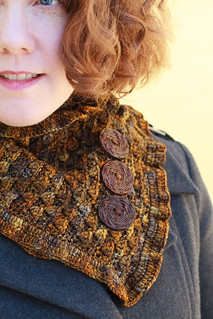
The second scarf is an example of what a simple stitch and a luscious yarn can do. The Knotty Herringbone Scarf (Ravelry link) is made from Malabrigo Twist, a super soft and squishy merino wool. I’ve been wearing this one around Colorado–because we live her now and I can wear warm scarves!– and I get so many compliments, probably because of the fun color. The knotwork adds another interesting detail, and it’s not very hard to do. If you are feeling fancy you can throw some beads in the fringe for extra fun.
The book is full of beautiful and quick designs to make by designers you love, like Robyn Chachula, Ellen Gormley, Marly Bird and more –and you can even download it for instant gratification or quick-start gift making. Be sure to check it out!
In the spirit of avoiding shopping malls, all of my individual patterns are on sale for 20% off from now until Monday 11/26 with the coupon code turkeyday. In case you missed it, I released individual patterns from my E-book last week as well, and those are included in the sale as well. This applies only to the patterns in my Ravelry store, so if you are in need of some patterns to make holiday gifts, go check it out!

Craftsy is also having a huge sale on ALL classes- each is $19.99 or LESS! If you haven’t tried one yet, now is your perfect chance! I have had the pleasure of producing a lot of classes in the past few months and I have to tell you, the instructors are so talented and giving with their years of knowledge and expertise. I always learn new things, no matter what the subject. And remember, you can take them whenever you want to, so even if you’re busy with holiday hustle+bustle, you can save one up for the new year.
This week I’ve been working on a second version of the Piped Petals Cardigan in my Sugar and Spice E-book.
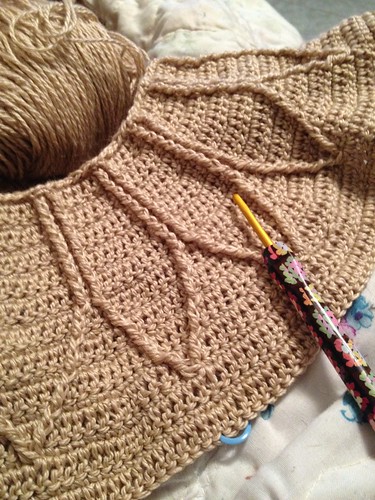
I am working it in Fyberspates Scrumptious sport weight yarn. I bought two skeins of it on Craftsy thinking that it was white and I could use it for a shawl for my wedding. It turns out that the color, Oyster, is more of a pearly tan–but, I found my (non traditional) dress this weekend and this color will be perfect! I’m going to make it a shorter shrug, and see how far I get with two skeins. I can always add another if I need to. I do love being able to see the post stitch design a lot more easily with this light color.
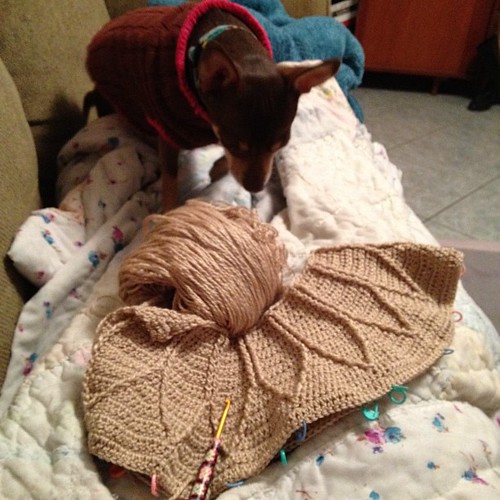
Freddie came to check it out but I don’t want him to do too much snuggling in it, so that I can keep it in good shape. Silly dog.
Whew, I have been remiss in blogging my new designs, but there are a lot of recent releases right now. Just before I took this job and moved our lives to Colorado, I was really ramping up my submissions and they were all nestled together in release times, so enjoy. I love my job, but I also still really love releasing new patterns and seeing what you guys come up with, so I hope to be able to continue contributing whenever possible.

I have three patterns in Interweave Crochet Accessories, and all of them are fairly simple. Let’s start with the Textured Swirl Hat. It’s a quick to work bottom up pattern worked in worsted weight yarn (Vickie Howell’s Sheepish). Post stitches and double crochets are about all it takes to get this whipped up.
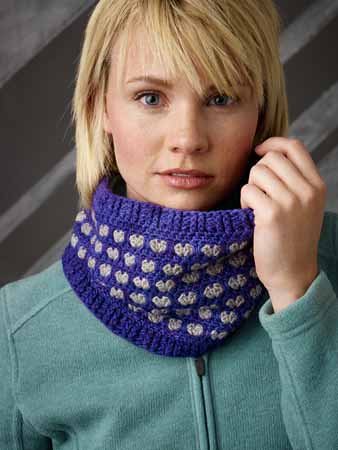
Next is the Little Hearts Cowl. You might recognize the stitch pattern inspiration from my Hearts Kid’s Cardigan here– I just wasn’t done with it after one pattern. This is worked in Manos Silk-wool blend which is a drapey and soft DK, and makes a really nice FO. As with the kid sweater, you only work with one color at a time, contrary to how it might look, which keeps the stitching simple.
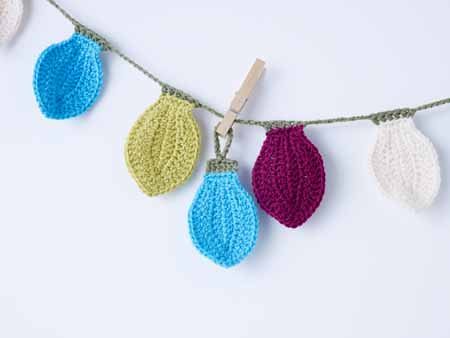
Finally, I came up with a cute little Holiday Lights Garland that you can make to decorate your house or apartment. I still absolutely love my Tree Garland pattern from Crochet Today but this one will work up a lot quicker. Each bulb is worked from the center out, and then you actually crochet the string along with the top of the bulb, so that when you’re done, it’s all put together. This one is worked in Deborah Norville’s yarn, but I think it would be extra fun in a shimmery sparkle yarn. It’s worsted weight as well, so perfect if you’ve got lots of scraps hanging out.
This issues is already out as an E-collection and should be on newsstands too–just in time for holiday gift making.
The lovely ladies at Tangled have done it again with their fall collection of knit and crochet designs! I always look forward to seeing the mix of knitting and crochet in their seasonal collection.

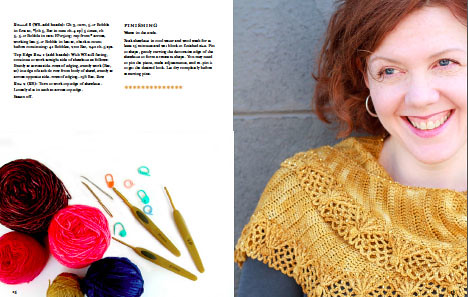
My contribution for fall is the Eyelet Yoke Cardi (here’s the Ravelry page), a simple to work top-down cardigan with a little bit of lace (err, eyelets) and a little bit of sparkle, thanks to the Berroco Flicker yarn we chose. The yarn is worsted weight but due to it’s chainette construction and the soft alpaca, it is light and airy–meaning it won’t weight the sweater down. Keep that in mind if substituting yarn– something on the lighter side (ie more yardage per grams) is going to make a nice drapey sweater.
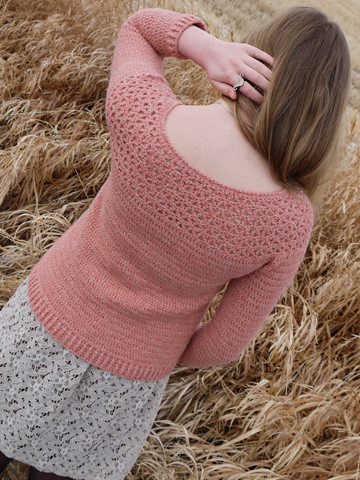
I went so far as to make my own, in the very same yarn, when I saw all of the new colors they released this year. This deep blue is so pretty, and it’s a good value for the yardage. I made a size in between the Small and Medium (by doing fewer increases) and I think I used 10 skeins. I must say it is super warm, being 87 percent alpaca, so those eyelets act as nice little vents. Hah! But I am always hot, even when it is cold, except when I am not.
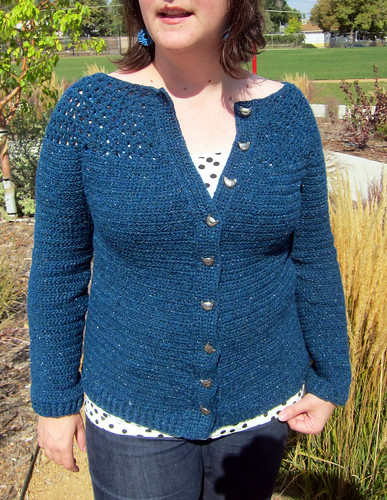
I went all out and added these silver cat buttons from my stash to compliment the silvery glint to the flicker yarn. I like this yarn- it has glitter, but it’s not insane over-the-top shimmer. And it is really squishy.
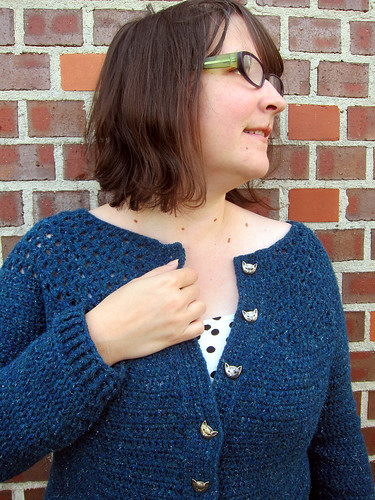
The pattern is $6.50, and it and the yarn are available online at Tangled. It comes in sizes: 32 (35.5, 41, 43.5, 48, 52)” bust circumference. You can also favorite on Ravelry! Since it’s top down, you can check the length and cut back on increases if you like to change up the size if you are in between sizes. Happy hooking!
Just a few little updates on my recently released E-book venture, Sugar and Spice: Six Bakery Inspired Crochet Designs.

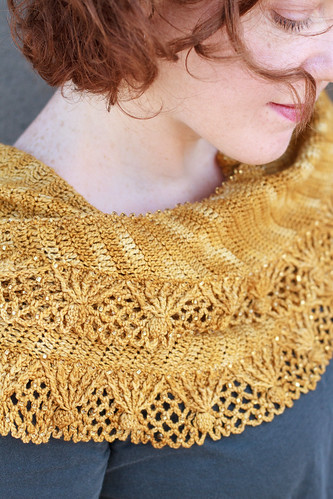
First off, you can listen to me talk about why e-books and my inspiration for these particular projects (plus get a chance to win one!) in the Yarn Thing podcast with Marly Bird. We podcasted live from the Craftsy offices, which was a pretty fun way to do it! I’m wearing my Sugar Sparkles Shawlette–which, if you couldn’t tell–is laden with beads, check it out!
Here’s the announcement from the Malabrigo Blog (the book is part of their Freelance Pattern Project).
Susan B. Anderson had some lovely things to say about it, including: Honestly, I don’t think I’ve ever seen more gorgeous crochet designs in my life.
Wow!
Robyn Chachula reviewed it here (hurry for a chance to win a copy!), saying: And this collection, is definitely a book. Everything is professionally edited, photographed, and laid out. Anything you might need explained is described in detail as you would expect with Linda’s patterns.
More to come, and thanks so much to everyone who has purchased it so far. I really appreciate it!
Tomorrow: Another new design! Next week: More reveals. It seems like all of the work I finished just before I took this job is coming to the light now.
I’ve been working on a secret project for the past year that I can finally share with you; it’s an e-book! Last year, when I had no idea where time would take me, I knew I wanted to work on a book-like project and I wanted to do it myself. The Malabrigo Freelance Pattern Project was the perfect opportunity: malabrigo donates the yarn, the designer makes the e-book. It’s already a favorite yarn of mine–it’s soft, with wonderful colors, and a good value because of the generous yardage. I got the green light on the project and got to work.
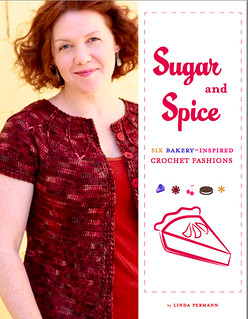
Luckily I finished all of the designing before I accepted my job at Craftsy, and was able to turn around the tech editing process (with KJ Hay) before I moved. I hired Caro Sheridan as my photographer–and she did a wonderful job showcasing the details in the fabric. Since I was making steady money and had a lot less time, I decided to hire a graphic designer (Heather Crank, who I work with at Craftsy) to put it all together. And now I present you with Sugar and Spice: Six Bakery-Inspired Crochet Fashions! All of the projects are named after desserts, and most of them feature post stitches, bobbles, or other crochet texture. Piped Petals Cardigan is shown on the cover, it’s a top down cardigan that builds post-stitch petals into the yoke along with the increases. It’s actually quite simple to make but with stunning results. I made it to fit me and I wear it all the time: yay, bonus of doing an E-book!
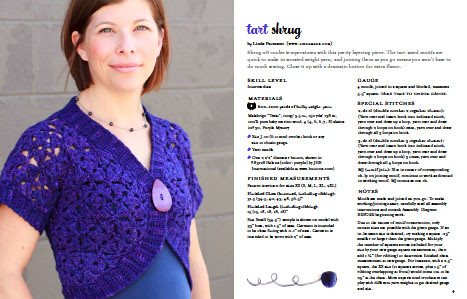
Tart Shrug is a motif-based shrug sized between 31.5 and 56.5″ at the bust (6 sizes) featuring Malabrigo Twist (bulky). The motifs are joined as-you-go and the ribbing is worked into the finished piece so there is very minimal seaming. All of the buttons used in the book were generously donated by JHB Buttons. I love buttons!
Pizzelle Beret is a richly textured hat worked in Malabrigo Lace (one of my absolute favorite yarns for crochet). Since it’s worked in the round from the top down, the right side is always facing you, and it’s somewhat intuitive where the post stitches go, once you get going. Check out the larger photo on my flickr page to really see the details. It creates a wonderfully light and soft fabric, perfect especially for those who don’t live in super cold climates.
Sugar Sparkles Shawlette is another favorite– I was thinking of Thanksgiving pie crusts when I designed it. The main body is worked from side to side in lovely sock yarn, then the beaded border begins. A total of 675 beads are used in the textured lace border, which give the shawl a nice weight for wrapping as well as a subtle glisten. I’ve designed it in such a way that you can thread the precise amount of beads you need for each row as you go, resulting in a few yarn breaks but a lot less sliding of beads when you are working non-beaded rows. It also worked out perfectly that the beads show where to work the set-up row of post stitches, which was a happy discovery for me. I love to wrap this crescent shaped shawl around and around so I can show off the delicate border.

Cherry Cobbler Beanie is the second hat in the collection, and it’s sized for the whole family (14″, 16″, 18″ and 20″–and they stretch to fit heads about 2″ bigger than that). This one is also worked in sock yarn, from the bottom up, and all of the cables are worked with the right sides facing you. They converge at the top to form radiating lines, and then the ribbing is worked along the bottom edge.
The sixth and final pattern is the Cocoa Wafer Cowl, a textured rectangle with three buttons to add texture and interest. This one has a simple four row repeat and can be pretty mindless once you get going. I actually want to try it using 2 colors to see what that does to the pattern–I’ll be sure to share if and when I do.
The collection is available on Ravelry or Craftsy for $18. If you aren’t a member of either, you can also buy it now through this ravelry link. Happy Hooking!
|
Free Patterns and Tutorials
|


